
What Is the Window Tint Installation Process?
- Robert : )
- 7 days ago
- 5 min read
A clean tint job is more than a darker window. The window tint installation process affects how your vehicle looks, how comfortable it feels on a bright Pennsylvania afternoon, and how well its interior holds up over time. Done right, the film sits smooth and consistent from edge to edge. Done carelessly, it can leave visible debris, uneven edges, bubbles, or gaps that take away from the entire vehicle.
At AutoMPressions, we believe in affordable, expert care with no shortcuts. That starts by treating tint installation as precision work, not a quick add-on service.
Before the Window Tint Installation Process Begins
Every vehicle is different. Window shape, factory glass, trim design, existing tint, rear defroster lines, and even how a door panel is built can change the approach. Before film is selected or glass is cleaned, a professional installer should look over the vehicle and discuss the result you want.
Most drivers are looking for a combination of heat reduction, glare control, privacy, and a sharper appearance. Some want a subtle factory-style look. Others prefer a darker finish that makes a daily driver, truck, or SUV stand out. The right option depends on your goals, your vehicle, and the legal tint requirements that apply to its window locations and vehicle type.
This is also the time to choose the film itself. Quality tint films can offer different levels of visible-light transmission, heat rejection, UV protection, and clarity. A darker film is not automatically better at rejecting heat, and the cheapest film is rarely the best long-term value. Good material and correct installation work together to prevent fading, discoloration, peeling, and poor visibility over time.
If your vehicle has old aftermarket tint, it may need to be removed first. That adds time because old adhesive has to come off cleanly, especially around rear defroster lines. Rushing removal can create a bigger problem than the tint itself, so this step deserves patience.
Glass Preparation Makes or Breaks the Result
Tint film is installed on the inside surface of the glass, but the preparation begins with a detailed cleaning process. Even a small amount of lint, dust, pet hair, residue, or interior dressing can become trapped under the film. Once that happens, it is visible every time the sun hits the window.
The installer thoroughly cleans the glass, window seals, edges, and surrounding work area. Door panels and trim are protected as needed, and the glass is cleaned again before the film goes on. This is one reason a controlled shop environment matters. It is difficult to get professional results when wind, pollen, loose debris, and changing temperatures are working against the installation.
A few tiny specks can occasionally be visible after installation, particularly on older vehicles or glass with age-related imperfections. That is different from widespread contamination, creases, or large debris. Honest workmanship means setting realistic expectations while still pursuing the cleanest finish possible.
How Window Tint Is Measured and Cut
After the glass is prepared, the film is measured and shaped to match each window. Depending on the vehicle and installer’s equipment, film may be computer-cut for a precise pattern or hand-shaped directly on the outside of the glass before installation inside.
The film is trimmed to follow the window’s contours and edges closely. Proper fit matters for appearance, but it also helps the film stay secure as windows move up and down. Windows with deep curves, small fixed quarter glass, or complex rear glass take additional skill because the film must conform without distortion.
Rear windows are often the most technical part of the job. Their curved shape requires the film to be heat-shrunk so it lays flat against the glass. This is not about heating the glass aggressively. It is a controlled process that allows the film to take the correct shape before it is installed. A skilled installer works carefully around defroster lines and antenna elements to protect the vehicle’s features while creating an even finish.
Applying the Film to the Inside Glass
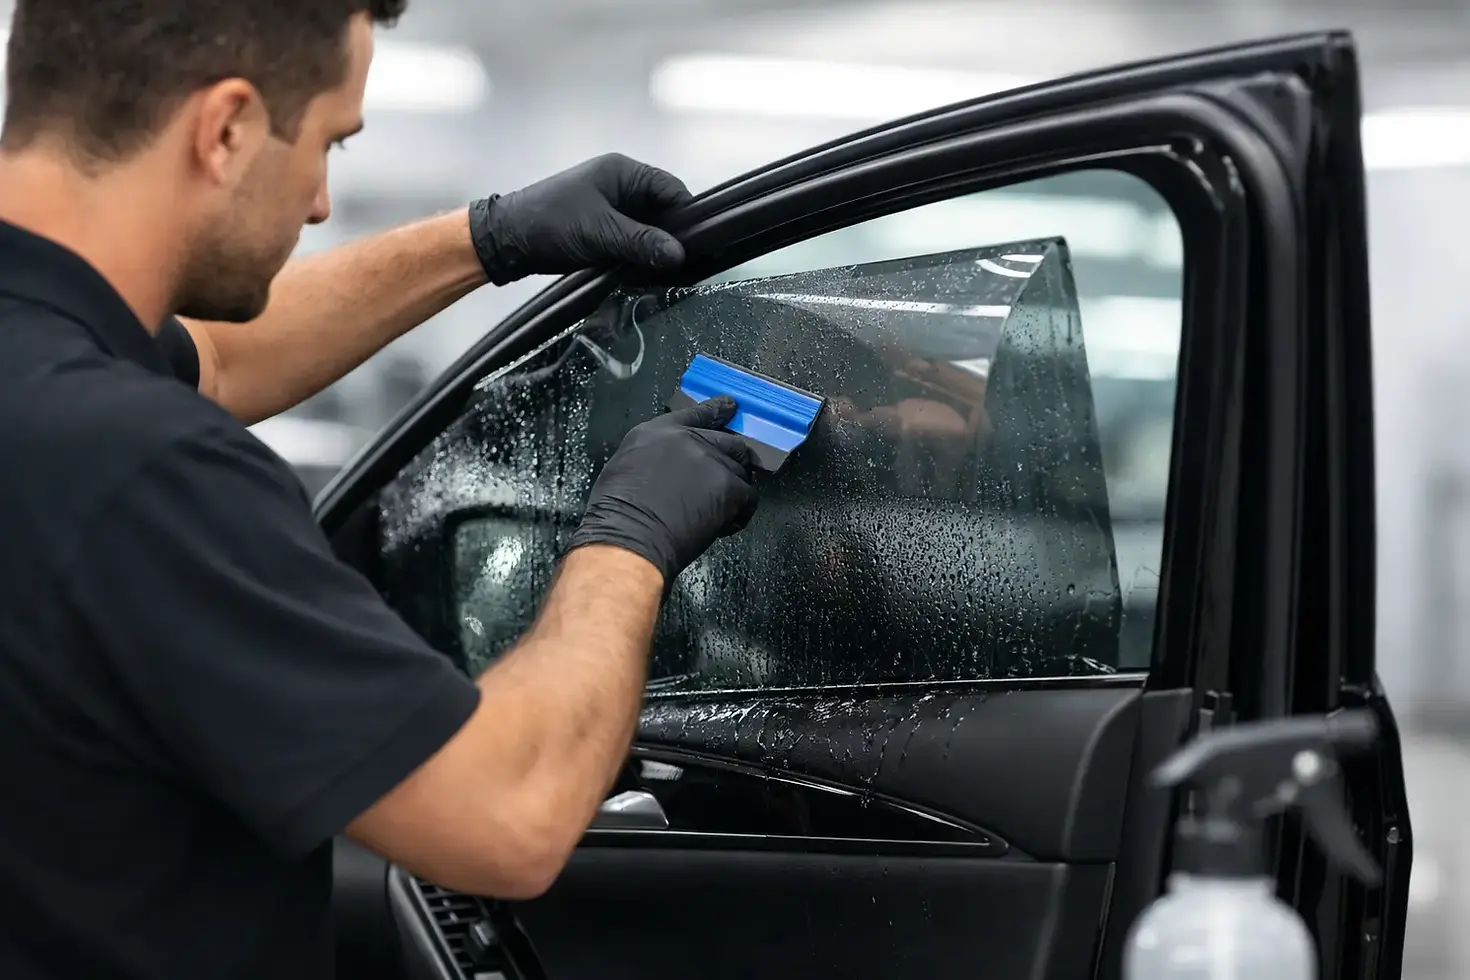
Once the film is cut and formed, the installer applies a slip solution to the glass and adhesive side of the film. This allows the material to be positioned accurately before it is secured. The liner is removed, the film is placed on the inside of the window, and a professional squeegee is used to press out the solution and air.
This part of the window tint installation process requires a steady hand. The installer aligns the film, sets the top edge, works moisture toward the edges, and checks the panel from different angles. The goal is a uniform appearance without creases, lifted corners, or visible gaps.
On roll-down windows, the upper edge needs special attention. A close, clean edge helps the tint look factory-installed rather than obviously added. The window may be lowered slightly during the job so the film can be finished correctly at the top, then raised again for final inspection.
Some moisture remains beneath the film immediately after installation. That is normal. Fresh tint can look slightly hazy, show small water pockets, or have a faint textured appearance while it begins to dry. Those conditions should improve during the curing period. Large bubbles, folded film, scratches, or edges that are clearly peeling are not normal and should be addressed.
Curing Time: What to Expect After Installation
Tint does not fully cure the moment you drive away. The remaining installation solution needs time to evaporate, and the adhesive needs time to bond to the glass. Warm, dry weather generally speeds up curing. Cool, humid conditions can make the process take longer.
For the first several days, avoid rolling down tinted windows unless your installer gives you different instructions. Many shops place reminders near the window controls for good reason. Rolling a window down too early can disturb the top edge before the film has settled.
It is also normal to notice a few small water bubbles or light haze during this time. Do not press on the film, pick at an edge, or try to push moisture out yourself. Give it time. If something still looks questionable after the recommended cure period, contact the installer so it can be evaluated properly.
Your rear defroster can typically be used after the film has cured according to the installer’s guidance. Because rear glass has heating elements and often a more complex film shape, following the aftercare instructions is especially worthwhile.
How to Care for Fresh and Cured Window Tint
Once the film has cured, maintenance is straightforward. Use a soft microfiber towel and an ammonia-free glass cleaner made for tinted windows. Spray the towel rather than soaking the edge of the film, then wipe gently. Abrasive pads, harsh cleaners, and rough paper products can leave marks or damage the finish.
Tint is a practical upgrade, but it is not armor. Sharp objects, seatbelt hardware, metal jewelry, and pets can scratch film. If a window has mechanical issues, such as worn seals or a regulator that drags against the glass, repair those concerns before they damage a new installation.
Quality window tint can help reduce harsh sunlight and protect interior materials from UV exposure, but it should be part of an overall care plan. Regular interior detailing, protected upholstery and trim, and clean glass all help your cabin continue to look its best.
Why Professional Installation Is Worth It
DIY tint kits may seem like a way to save money, but they leave little room for error. Contamination, poor shaping, uneven cuts, and trapped air can turn a low-cost project into a removal-and-replacement job. Professional installation provides the controlled environment, correct tools, quality film, and hands-on experience needed for a polished result.
The value is not just in the film. It is in the preparation, the fitment, the care around your vehicle’s glass and trim, and the willingness to stand behind clean work. Whether you are improving a family SUV, protecting the interior of a new truck, or giving your daily commuter a more finished look, the details show.
A well-installed tint should make your vehicle feel better every time you get behind the wheel - cooler in the sun, easier on the eyes, and finished with the kind of clean, confident appearance you are proud to drive.