
How to Remove Swirl Marks From Your Car
- Robert : )
- Jul 11
- 5 min read
Those spiderweb-like lines that show up across your hood in direct sunlight are not just dirt. They are swirl marks - fine scratches in the clear coat that dull the paint, soften reflections, and make an otherwise clean vehicle look tired. They are especially frustrating after you have just washed your car and expected it to shine.
The good news is that most swirl marks can be improved or removed. The catch is that fixing them correctly takes more than grabbing a bottle of wax and rubbing harder. Paint correction is a controlled process, and the best method depends on how deep the defects are, the condition of the paint, and how much clear coat is available to work with.
How to Remove Swirl Marks Without Damaging Paint
Swirl marks are usually caused by improper washing and drying, not normal driving. Automatic car washes with dirty brushes, rough towels, dusty wiping, and using one bucket for everything can all drag debris across the clear coat. Even a vehicle that is carefully maintained can build up light marring over time.
To remove them safely, start by washing the vehicle thoroughly. Use a quality car shampoo, clean wash media, and plenty of lubrication. The paint needs to be free of loose dirt before any polishing begins. Skipping this step can create more scratches while you are trying to correct the old ones.
After washing, inspect the paint in bright sunlight or under a focused LED inspection light. This reveals what you are really dealing with. Light swirls may only need a finishing polish. Heavier swirls, wash-induced scratches, oxidation, or random deeper scratches may require a more aggressive compound followed by a refining polish.
The goal is not to scrub the scratch away. It is to carefully level a tiny amount of the surrounding clear coat so the surface reflects light evenly again. That is why technique matters. Too much correction can reduce the clear coat unnecessarily, while too little leaves defects behind.
Start With the Least Aggressive Method
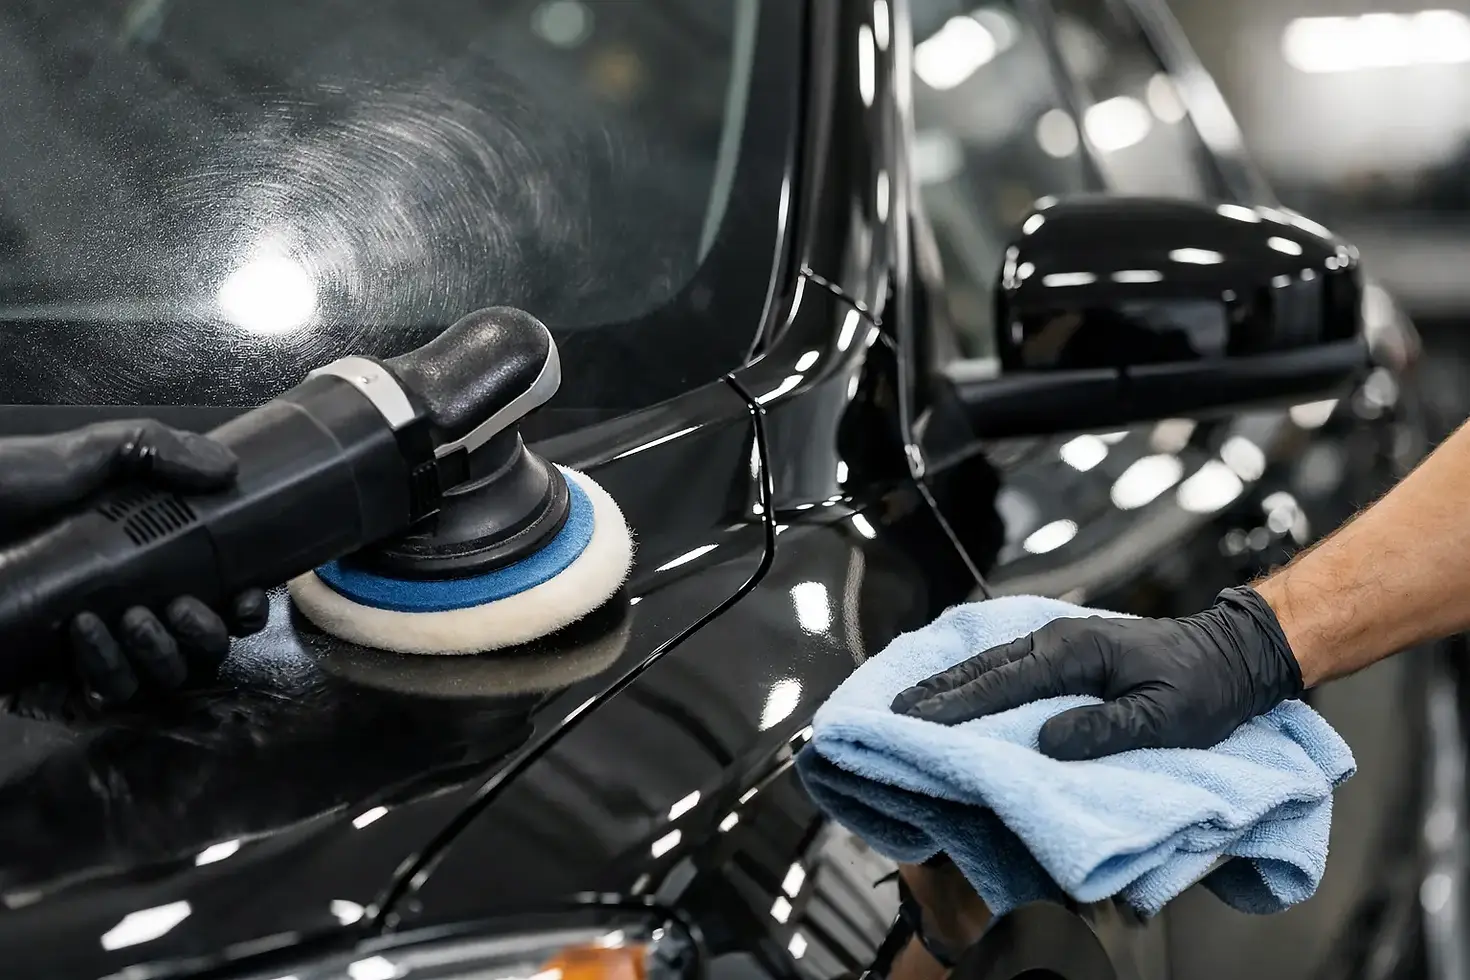
A good rule in paint correction is to begin with the mildest effective combination. On light swirl marks, a finishing polish used with a dual-action polisher and a soft foam pad can make a dramatic improvement. Work a small test section first, then wipe away the residue and inspect the result before doing the rest of the vehicle.
If that test spot still shows significant defects, step up to a light or medium compound with an appropriate polishing pad. Follow it with a finishing polish to restore clarity and depth. Compounding can remove more severe damage, but it can also leave a slight haze if it is not refined afterward.
Hand application products can help conceal very light marring, especially on a daily driver. However, they rarely provide the correction level that a machine polish can achieve. There is nothing wrong with choosing a temporary improvement, but it helps to be honest about the expected result. A glaze or filler may look great for a few washes, while true polishing physically improves the paint surface.
Clay Before Polishing When the Paint Feels Rough
If the paint feels rough after washing, it likely has bonded contamination such as industrial fallout, road film, or tree residue. A clay bar or synthetic clay towel can remove that contamination and leave the surface smooth enough to polish properly.
Use plenty of clay lubricant and light pressure. Clay is a decontamination tool, not a correction tool. Pressing hard can create marring, particularly on darker paint. Once the surface is clean and smooth, the polish can work evenly instead of fighting contamination.
Tools That Make Swirl Mark Removal Safer
For most vehicle owners, a dual-action polisher is the safest machine option. Unlike a rotary polisher, it uses a random orbiting motion that makes it less likely to generate excessive heat in one spot. It still requires care, but it gives beginners a larger margin for error.
You will also need clean microfiber towels, polishing pads, a quality compound or polish, panel prep spray, and good lighting. The towels matter more than people think. A towel with embedded grit can put fresh marks right back into the finish. Keep separate towels for paint, wheels, door jambs, and interior work.
Avoid using an old T-shirt, bath towel, or household rag on exterior paint. Those materials can be too rough, and they often trap debris. Quality microfiber is a small investment compared with the cost of repainting a panel.
There is also a place for professional paint thickness readings. Modern clear coats are not unlimited. A paint correction specialist can measure paint depth, identify repainted panels, and build a correction plan that improves the finish without taking unnecessary risks. That is especially valuable on older vehicles, thin factory paint, or cars that have been polished several times before.
What Not to Do When Removing Swirl Marks
Do not polish a dirty vehicle. Do not use heavy pressure because you think it will work faster. And do not assume every scratch can be removed safely. If a scratch catches your fingernail, it may extend beyond the clear coat. Polishing can soften its appearance, but full removal could require more paint removal than is wise.
Be careful with all-in-one products that promise correction, shine, and protection in one step. They can be useful for vehicles that need a modest refresh, but they are a compromise. They generally do not correct as thoroughly as a dedicated compound and polish process, and their protection does not last as long as a proper sealant, wax, or ceramic coating.
Automatic brush washes are another common reason swirl marks return. A fast wash may be convenient during a Pennsylvania winter, but the brushes can carry grit from vehicle to vehicle. Touchless washes are generally a safer choice when you cannot hand wash, although they may not clean heavy grime as thoroughly.
Protect the Finish After Correction
Once the paint has been corrected, protect it. Polishing exposes a clean, clear surface, but it does not make that surface immune to future damage. A quality paint sealant or ceramic coating adds chemical resistance, water behavior, and easier maintenance. It will not stop rock chips or prevent every wash scratch, but it can help keep the finish looking cleaner and sharper between details.
Ceramic coatings are a strong choice for drivers who want long-term protection and easier washing. They are not magic, and they do not eliminate the need for careful maintenance. The coating is only as good as the preparation underneath it, which is why correction is often completed before coating installation.
For the best results, wash with the two-bucket method or a clean rinse-and-wash setup, use separate wheel tools, and dry with a clean microfiber drying towel or filtered air. Apply minimal pressure during drying. Most new swirl marks happen when dirt is moved across the paint, so reducing contact and keeping your tools clean makes a real difference.
When Professional Paint Correction Makes Sense
A DIY polish can be rewarding for light defects and owners who enjoy working on their vehicles. Professional correction is often the better route when the finish has heavy swirls, deep scratches, water spot etching, oxidation, or a dark color that shows every imperfection. It also makes sense when you want a high-level result before selling a vehicle, applying a ceramic coating, or bringing a newer car back to the condition it deserves.
At AutoMPressions, paint correction is approached with the same standard as every appearance service: honest assessment, precision work, and no shortcuts. Not every vehicle needs a multi-stage correction, and not every scratch should be chased aggressively. The right service is the one that delivers a visible transformation while respecting the long-term health of the paint.
A clean vehicle should look good in the shade. A properly corrected vehicle still looks good when the sun hits it directly. Keep it that way with careful wash habits, quality tools, and the right level of professional care when the paint needs more than a quick fix.